

Moisture is one of the most common hidden causes of “mystery” print failures: stringing that won’t go away, popping sounds at the nozzle, rough surfaces, weak layer bonding, inconsistent extrusion, and brittle parts - especially with hygroscopic materials like nylon and TPU (thermoplastic polyurethane). A DIY filament dryer solves this by keeping spools at the right temperature long enough to drive out absorbed water, then storing them in a low-humidity environment so they stay dry until printing.
This guide lays out the why, the design principles, and several proven DIY build paths - from simple desiccant dry boxes to actively heated dryers that can feed filament directly to a printer for 3D Printing in India.

Get Instant 3D Printing Quotes + 10% Off
Why filament gets “wet” (and why it matters)
Most 3D printing filaments are polymers that slowly absorb water from ambient air. That moisture doesn’t just sit on the surface; it diffuses into the material. When wet filament is heated in a hotend, water flashes into steam and creates micro-bubbles in the melt. The result can include:
- Audible popping or hissing at the nozzle
- Stringing and oozing that persists despite retraction tuning
- Blobby surfaces or pitted top layers
- Poor layer adhesion and reduced part strength
- Dimensional inconsistency from unstable extrusion flow
- Clog risk (particularly with filled filaments and small nozzles)
Why dry filament matters
Dry filament prints more predictably, produces cleaner surfaces, and typically needs less “heroic” tuning.
Drying vs. storing: two different jobs
A common misconception is that a sealed box with desiccant “dries” filament quickly when online 3D Printing India. In reality:
- Active drying requires heat + time + airflow exchange (or controlled venting) to move moisture out of the polymer and away from the spool.
- Dry storage requires low humidity to keep already-dry filament from reabsorbing moisture.
A combined approach
A good DIY setup often combines both: an actively heated drying chamber used periodically, plus a dry box used continuously.
Temperature targets (practical guidance)
Drying temperature must be high enough to accelerate moisture diffusion, but low enough to avoid softening, warping, or fusing filament on the spool. Because filament blends vary by brand, start conservatively and validate with a short test print during 3D Printing services in India.
- PLA (polylactic acid): ~40–50 °C
- PETG (polyethylene terephthalate glycol): ~50–60 °C
- ABS/ASA: ~60–70 °C
- TPU/TPE: ~40–55 °C (often benefits a lot from drying)
- Nylon (PA) and Nylon blends: ~70–90 °C (highly hygroscopic; needs patience)
- PVA/BVOH supports: low-to-moderate heat, handled gently; these absorb water extremely fast
Time matters
Light moisture might need a few hours; nylon spools left out for weeks may need significantly longer. A DIY dryer should be designed for stable, uniform temperature over extended runs.
Core design principles for a DIY filament dryer
A dryer that “sort of warms the spool” is rarely enough. The designs that consistently work share these fundamentals:
1) Even heat distribution
Hot spots can soften the spool edges while the inner layers remain wet. Heat should be gentle and circulated, not concentrated on one side.
2) Some airflow and moisture escape
Moisture driven out of filament must go somewhere. A perfectly sealed heated box can trap humid air and slow the drying process. Controlled venting (small exhaust holes) or periodic lid cracking helps.
3) Temperature control and safety
A dryer is a small heated appliance. It needs:
- A thermostat or controller that maintains safe temperature
- Overtemperature protection (thermal fuse or bimetal cutoff is strongly recommended)
- Components rated for the intended temperature
4) Spool support that won’t deform filament
Filament should unwind smoothly. Rollers or a low-friction spindle help prevent tangles and reduce feeder load if printing from the dryer.
5) Humidity awareness
A simple hygrometer inside the chamber provides feedback. The goal is not “0% forever,” but dropping humidity during drying and staying low during storage.
Build Option A: Desiccant dry box (best for storage, light drying)

Best for: PLA/PETG day-to-day use, keeping spools stable between prints
Limitations: slow at removing deeply absorbed moisture, especially for nylon/TPU
What’s needed
- Airtight tote or gasketed food container
- Spool holders or printed rollers
- Desiccant (rechargeable silica gel is popular)
- Hygrometer(s)
- Feed-through fittings (optional) to print directly from the box
How it works
Desiccant pulls moisture from the air inside the box, lowering relative humidity and preventing filament from reabsorbing water. Over time it can reduce moisture content somewhat, but it’s primarily a storage solution for 3D Printing Bangalore.
Practical tips
- Use enough desiccant to keep the box consistently low humidity.
- Recharge desiccant regularly (many types change color when saturated).
- Place desiccant so it has airflow around it (avoid burying it under spools).
- If printing directly from the box, ensure smooth filament path and avoid sharp bends at the exit.
Build Option B: Food dehydrator conversion (simple and effective)

Best for: reliable active drying with minimal engineering
Limitations: may require minor modifications for tall spools; aesthetics are “workshop-grade”
Why it’s popular
Food dehydrators are designed to do exactly what filament drying needs: warm air circulation and venting at modest temperatures. Many models maintain stable heat and already include a fan.
Typical modification approach
- Remove some trays to fit spools
- Add a spool stand or rollers inside
- Confirm temperature range can be kept in safe bands for the chosen filament
- Optionally add a better thermometer/hygrometer for confirmation
What to watch
- Some dehydrators run hotter than their dial indicates; verify with a thermometer.
- Ensure the spool and filament won’t touch a heating element.
- Avoid drying PLA too hot; spools can warp or filament can ovalize.
Bottom line
For many users, a dehydrator conversion is the highest success-per-dollar DIY dryer available for 3D Printing online.
Build Option C: Heated dry box (DIY chamber with controlled heat)

Best for: drying + storage in one device, printing directly from the dryer
Limitations: requires careful component selection and safety discipline
Concept overview
- A gentle heat source
- A circulation fan
- A thermostat/controller
- Vent holes to let moist air escape during drying
- Optional desiccant for storage mode
Suitable chamber choices
- Insulated cooler (often excellent thermal stability)
- Metal tool box (durable; can be modified for fittings)
- Heat-tolerant plastic tote (verify softening temperature and keep heat moderate)
Heating options (common DIY patterns)
- PTC heaters (self-regulating ceramic heaters) paired with a fan: stable, widely used in small enclosures
- Incandescent bulb / reptile heat element: can work, but needs careful shielding and reliable control
- Heating pads: useful as a base heater, but circulation is still needed to avoid hot spots
Temperature control
A thermostat with a probe inside the chamber is essential. Stability is the goal: steady temperature for hours is more effective than cycling extremes.
Airflow and venting
Use a small fan to circulate air across and through the spool layers.
Add a small exhaust vent (or adjustable vent). During active drying, slightly open vents help carry moisture out.
For storage mode, vents can be closed and desiccant used to maintain low humidity.
Printing directly from the dryer (a high-leverage upgrade)
For materials like nylon and TPU, filament can reabsorb moisture quickly after removal from heat. Printing straight from a dry environment often improves consistency over long prints.
Key design considerations
- Low-friction spool rollers to reduce extruder load
- Smooth filament exit path with a gentle curve
- Moisture barrier at the exit (tight grommet or fitting) to reduce humid air exchange
- Space for multiple spools if swapping materials frequently
Why combine drying + feeding
A combined dryer/feeder can be the difference between “first hour is great” and “last six hours degrade.”
Safety checklist (non-negotiable for heated DIY builds)
A filament dryer is a heater running unattended for long periods. Treat it like a small appliance.
- Use heat-rated wiring and connectors appropriate for the heater’s power.
- Include overtemperature protection (thermal cutoff) independent of the thermostat when possible.
- Keep heating elements away from plastic walls and filament.
- Avoid exposed mains wiring; use proper strain relief.
- Do not exceed safe temperatures for spool materials.
- Place the dryer on a non-flammable surface and allow ventilation around it.
- Verify performance with supervised test runs before leaving it unattended.
- If any part of the build feels uncertain, a dehydrator conversion is often the safer path.
A practical drying workflow (repeatable results)
A consistent workflow reduces guesswork and wasted time:
- Pre-check: confirm spool material, set conservative temperature, place hygrometer probe inside.
- Drying phase: heat at target temperature with airflow and slight venting.
- Stabilize: once humidity drops and stays lower, continue for additional time to dry deeper layers.
- Store dry: move to a sealed dry box with desiccant, or keep in the dryer with heat off and desiccant on.
- Print from dry: for hygroscopic materials, feed directly from the dry environment where possible.
Validate your results
A simple “before/after” print test (stringing tower or calibration cube) is a practical validation step.
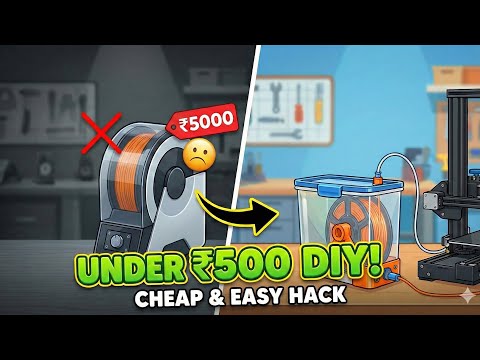
Video: DIY filament drying overview
Quick overview of practical DIY filament drying approaches
Troubleshooting: common DIY dryer problems
Filament still strings after drying
- Temperature may be too low or drying time too short.
- Humid air may be trapped (no venting).
- The filament may be inherently stringy (material and nozzle temperature tuning still matters).
Spool warps or filament deforms
- Drying temperature is too high or heat is uneven.
- Heat source is too close to one side; add airflow and shielding.
Humidity won’t drop inside the chamber
- Leaks are allowing constant humid air exchange.
- Desiccant is saturated (for storage mode).
- Venting may be too open during storage mode; close vents after drying.
Filament becomes brittle
- Some materials can become more brittle after overheating.
- Excessive heat time can degrade sensitive filaments; lower temperature and extend time instead.
What to build first
For most makers, the best progression is:
- Start with a desiccant dry box for storage and print feeding.
- Add an active dryer (dehydrator conversion or heated chamber) for TPU and nylon.
- Combine drying + feeding once consistent results are needed on long prints.
Why this sequence works
This staged approach prevents overbuilding while still solving the main print-quality issues quickly when 3D Printing in Bangalore.
Need Production-Grade 3D Printing Support?
Get expert help with material selection, manufacturability, and high-precision parts without the trial-and-error of tuning everything in-house.
Conclusion
A DIY filament dryer doesn’t need to be complicated; it needs to be controlled: stable heat, airflow, safe venting, and an environment that stays dry after the cycle ends. Whether the solution is a simple dry box, a modified dehydrator, or a fully integrated heated feed system, the payoff is measurable - cleaner extrusion, fewer failures, stronger parts, and far less time chasing settings that moisture will always sabotage.
