

The 3D printer's gantry is the motion backbone that determines whether prints come out dimensionally accurate, smooth, and repeatable - or plagued by ringing, layer shifts, skew, and inconsistent first layers. Hotends, firmware features, and slicer profiles get most of the attention, but the gantry is where motion quality is created (or lost). If the gantry flexes, binds, racks, or drifts out of square, no amount of temperature tuning will fully compensate.
The gantry should be treated as a complete system: frame stiffness, linear motion components, belt or screw drives, moving mass, and alignment discipline all interact. This guide breaks down what a gantry is, the major gantry architectures used in FDM (fused deposition modeling) printers, what “good” looks like mechanically, the failure modes to watch for, and the practical steps that stabilize performance - whether the goal is higher speed, tighter tolerances, or fewer failed prints when using online 3d printing.
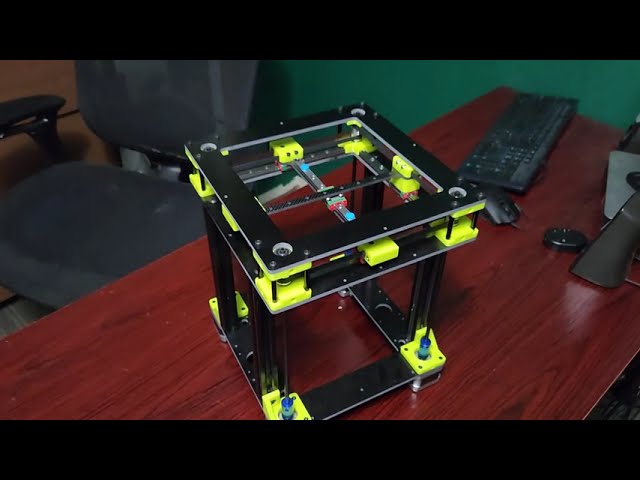
What “Gantry” Means in FDM 3D Printing
In most FDM printers, the gantry refers to the structure that supports and moves the toolhead (or bed) along one or more axes, typically X and Y, and sometimes includes the Z carriage/bridge as well.
What the gantry includes
- Structural members (extrusions, plates, brackets) that define stiffness
- Linear motion hardware (rails, rods, wheels, bearings) that guides movement
- Drive components (belts, pulleys, motors, leadscrews, gears) that create motion
- Carriages that carry the hotend/extruder assembly
- Fasteners and interfaces that maintain squareness and alignment over time
What a good gantry does
- Moves where commanded (accuracy)
- Moves smoothly (surface finish)
- Stays stable under load and time (repeatability)
Get Instant 3D Printing Quotes + 10% Off
Common Gantry Architectures (and What They Imply)
Bed-slinger Cartesian (moving bed in Y)
This is the classic layout found in many entry and mid-range printers. The toolhead moves in X, the bed moves in Y, and Z raises/lowers the gantry or bed depending on design.
- Pros: Simple mechanics and straightforward maintenance
- Pros: Often cost-effective and easy to tune at moderate speeds
- Tradeoffs: Bed inertia increases with size and print weight
- Tradeoffs: Higher-speed accelerations can introduce ringing and layer shifts, especially on large beds
- Gantry focus: X-axis rigidity and belt health
- Gantry focus: Y-axis bed carriage stiffness, wheel/rail condition, and bed support
CoreXY (crossed-belt XY gantry)
CoreXY uses two stationary motors and a belt system to move the toolhead in X and Y without moving the bed in XY.
- Pros: Lower moving mass in XY compared with many designs
- Pros: Scales better to larger formats; often enclosure-friendly
- Pros: Strong foundation for high-acceleration printing when executed well
- Tradeoffs: Belt routing and tension balance are more complex
- Tradeoffs: Misalignment can produce skewed geometry or inconsistent diagonals
- Gantry focus: Belt path alignment and matched tension
- Gantry focus: Gantry stiffness, rail alignment, and toolhead mass control
H-bot (single belt loop style)
Similar intent to CoreXY but different belt forces. If the frame is not very stiff, racking forces can appear.
- Pros: Can be mechanically simpler in some builds
- Tradeoffs: More sensitive to frame stiffness and racking
- Gantry focus: Frame rigidity and gantry squareness under load
Moving-gantry (toolhead moves in XY, bed moves in Z only)
Common in many modern machines: bed goes up/down in Z, while the toolhead gantry handles XY.
- Pros: Stationary bed in XY helps stability and reduces inertia issues
- Pros: Often better for tall prints and consistent layer stacking
- Tradeoffs: Requires a stiff XY structure to maintain accuracy across the build area
- Gantry focus: XY bridge stiffness, Z lift stability, and consistent gantry leveling
The Engineering Metrics That Matter Most
1) Stiffness vs moving mass
High speed is not just “printing fast”; it is accelerating fast while keeping motion controlled. Gantry stiffness must rise as acceleration rises. Meanwhile, moving mass should stay low, because extra mass increases forces that excite vibrations.
Practical implication: A lighter toolhead and a stiff gantry often outperform a heavier, feature-packed toolhead on a flexible frame—especially in corner quality and ringing.
2) Squareness (orthogonality)
If X and Y are not perpendicular, printed parts come out as parallelograms: holes drift, edges are off, and assemblies stop fitting.
- Common causes: Frame not squared during assembly
- Common causes: Uneven belt tension pulling the gantry out of alignment
- Common causes: Loose corner brackets or plate interfaces
- Common causes: Twisted extrusion members
3) Smooth linear motion (low friction, low play)
A gantry must move smoothly without binding and without slop.
- Binding causes: missed steps, inconsistent extrusion (from speed fluctuations), and banding
- Play causes: chatter, dimensional drift, and artifacts that appear as random quality loss
4) Drive integrity (belts, pulleys, screws)
Drive components convert motor rotation into axis movement. Any slip, stretch, or backlash shows up directly on the print.
- Belts: Tension, tooth engagement, and belt alignment on idlers
- Pulleys: Set screws on shaft flats, concentricity, and tooth quality
- Screws: Straightness, coupling alignment, nut preload, and lubrication
Gantry Components: Options and Tradeoffs
Linear motion systems
- V-wheels on aluminum extrusion — Common and affordable
- V-wheels on aluminum extrusion — Can print very well when adjusted correctly
- V-wheels on aluminum extrusion — Requires periodic wheel preload checks; wheels can wear
- Smooth rods + bearings — Proven and simple
- Smooth rods + bearings — Rod support and bearing quality matter
- Smooth rods + bearings — Long spans can flex if under-supported
- Linear rails (e.g., MGN style) — High constraint and good repeatability
- Linear rails (e.g., MGN style) — Installation alignment is critical; misalignment can create binding
- Linear rails (e.g., MGN style) — Cleanliness and lubrication matter for longevity
Belt-driven vs screw-driven axes
Belts excel for fast XY motion and can be very accurate when properly tensioned and aligned.
Leadscrews/ballscrews are common for Z and sometimes for heavy axes; they can introduce periodic artifacts if misaligned.
In most FDM machines, the best results come from belts for XY and screws or belts for Z, depending on design goals—whether you’re dialing in a hobby build or working with 3d printing bangalore.
How Gantry Problems Show Up in Prints (Symptom-to-Cause Map)
| Symptom | What it looks like | Common causes |
|---|---|---|
| Ringing / ghosting near corners | Ripples after sharp direction changes | Resonance from flexible gantry, high acceleration/jerk, loose belts, heavy toolhead, poor frame rigidity |
| Layer shifts | Entire layer offset in X or Y | Belt slip, pulley set screw loose, binding on rails/wheels, motor overheating, collision with part, aggressive acceleration |
| Skewed prints (non-square parts) | Rectangles become parallelograms | Frame not square, uneven belt tension in CoreXY, racking on gantry, loose structural joints |
| Z banding that mimics gantry issues | Repeating horizontal patterns | Z screw wobble, coupler misalignment, Z binding, inconsistent bed lift |
| Inconsistent first layer across the bed | Perfect squish on one side; too high/low on another | Bed not trammed, gantry not level (especially dual Z), frame twist, uneven wheel preload, rail misalignment |
A Practical Gantry Health Checklist (Makenica)
Mechanical checks (fast, high impact)
- Verify frame bolts are tight and corners are square
- Confirm pulleys are tight on motor shafts (set screw on flat)
- Inspect belts for fraying, glazing, or tooth damage
- Ensure belts run centered on idlers and pulleys (no rubbing)
- Check for smooth hand movement across full travel (motors disabled)
- Confirm no cable drag that changes with position
- Validate wheel preload (no wobble, but not over-tight) or rail smoothness
Motion tuning checks (after mechanics are stable)
- Reduce acceleration and jerk to see if ringing improves
- Tune input shaping (if supported) to reduce resonance artifacts
- Calibrate pressure advance to reduce corner bulges (extrusion dynamics)
Input Shaping and Resonance (Video)
Upgrades That Actually Improve Gantry Performance (and When)
Not every upgrade helps. Some add weight or complexity that cancels the benefit. The best upgrades are those that increase stiffness, reduce friction, or reduce moving mass.
High-value upgrades
- Better belt management: quality idlers, true pulleys, reliable tensioners
- Stiffer X beam: larger extrusion or carbon/fiber-reinforced beam (design-dependent)
- Linear rails (properly installed): improved constraint at higher accelerations
- Dual Z + gantry leveling: reduces X-gantry sag and improves first-layer consistency
- Toolhead mass reduction: compact extruder/hotend, tidy fan ducting, lighter mounts
Upgrades that require caution
- Overbuilt toolheads with multiple heavy accessories can worsen ringing
- Poorly aligned rails can introduce binding worse than V-wheels
- Excessively tight belts can wear bearings and cause motor strain without improving quality
Maintenance: Keeping the Gantry “In Tune” Over Time
A gantry drifts because 3D printers vibrate for hours. Preventive maintenance reduces surprises—whether at home, in a lab, or through services like 3d printing bangalore.
- Recheck pulley set screws periodically, especially after transport
- Inspect belts and retension as needed (consistency matters more than tightness)
- Clean and lubricate rails per manufacturer guidance
- Keep wheels and extrusion tracks clean of dust and filament debris
- Verify cable chains/looms remain secured and do not tug the toolhead
Gantry Design Choices That Improve Print Quality (Even Before Upgrades)
- Favor continuous load paths: Bracing corners and reducing long unsupported spans improves consistency
- Keep motion planes aligned: Any twist in the frame forces the gantry to fight itself, increasing friction and causing inconsistent probing or first layers
- Treat the gantry as part of the thermal system: Designs that allow parts to expand without stressing mounts maintain squareness better during long prints
Bottom Line: The Gantry Determines the Printer’s Ceiling
A strong gantry raises the ceiling on speed, surface finish, and dimensional accuracy. A weak gantry forces slow printing and constant troubleshooting.
The most reliable path to better results is simple: stabilize mechanics first (stiffness, squareness, smooth motion), then tune motion control (acceleration, resonance compensation, extrusion dynamics). Once the gantry is healthy, slicer tweaks become refinements instead of band-aids—exactly where they belong.
